

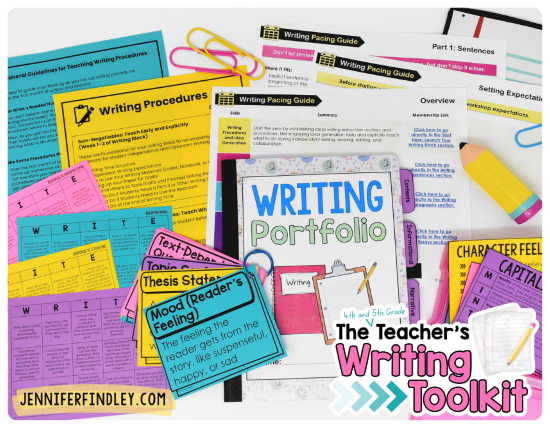
Looking for even more support on how to teach writing in 4th and 5th grade? Grab the writing toolkit that gives you resources to help you with pacing, procedures, and engagement for free.
We’ve probably all been there. You teach a mini-lesson, walk a student through a writing strategy, or have a great one-on-one conference. You send them back to their seat…and the next thing you know, they’re frantically erasing. Like full-on erasing paragraphs.
It’s like their first instinct is: Erase it all. Start fresh.
Or they get frustrated and shut down completely. Or even worse they ask to rewrite the entire thing from scratch.
We’ve likely all seen it.
That’s why in this post, I’m not talking about what to revise. I’m not walking through a revision checklist or strategy. I want to talk about the logistics—how we actually set students up to make revisions in a way that feels doable and productive.
Because when we don’t set up the logistics, students default to what they know: erase, redo, or avoid.
How to Set Students Up for Revision (Without Rewriting Everything)
Here are a few simple, practical ways to help students actually revise without erasing their whole draft or feeling like they have to start from scratch.
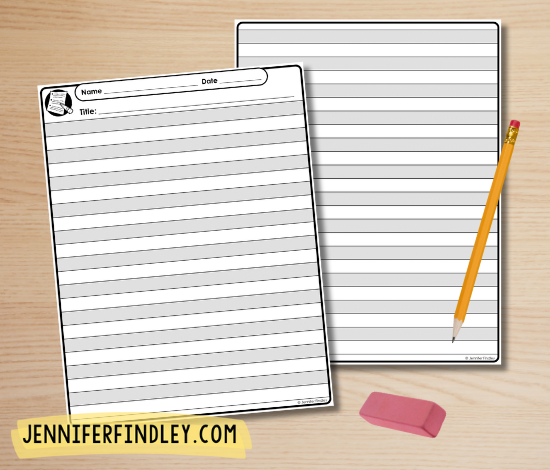
1. Use Special Drafting Paper or Teach Students to Skip Lines
Whether it’s actual double-sided drafting paper or just regular notebook paper where students skip lines, this makes a huge difference. It gives students room to add or replace words, phrases, or even short sentences above their original writing.
They can cross something out and write a new version right above it or leave both and decide which one they like better.
Bonus: This setup also makes it way easier to teach and use basic proofreading marks. Students actually have the space to add carets, insert words, or mark punctuation changes without cramming them into the margins.
2. For Bigger Revisions, Use Sticky Notes or Clip-On Pages
Sometimes students want to add a whole paragraph, rewrite an ending, revise a scene they now realize doesn’t work, or add some dialogue between the characters.
We need to give them a way to do that without rewriting the entire piece.
- Use sticky notes for small additions.
- Use index cards or slips of paper for longer revisions.
- Have them paper clip those revisions to their draft.
Then teach them to draw a small symbol, like a little page icon or an asterisk, on the spot where the new piece belongs. If students have multiple additions, they can number them (#1, #2, etc.) so they know the order.
This lets students revise freely without losing their momentum, worrying about fitting it all in, or worse, doing the dreadful erase it all.

3. Teach Students to Read With Revisions in Mind
Once they’ve added or rewritten something, have them practice reading their piece out loud, inserting the new section where it belongs.
Doing this helps students hear how the new parts fit. It also helps them decide if their revision works or if it needs further tweaking.
What This Looks Like in Real Life
- A student wants to revise a sentence in the middle of their essay. Instead of erasing, they write a stronger version above it on the skipped line. Later, they can choose which one to keep.
- Another student realizes they never included how the character was feeling. After a mini- lesson on adding internal thoughts or emotions, they write a new sentence on a sticky note and place it where it belongs—right after the action.
- A third student wants to completely revise a paragraph. They rewrite it on a separate sheet, paper clip it to the draft, and draw a small page icon in the original draft to show where the new version belongs.
When and How to Teach This
Teach these routines the first time students revise before they reach for an eraser.
Then, keep revisiting them after each revision-focused lesson as a quick reminder: “Here’s how to add this without starting over.”

Revising: Don’t Erase—Improve!
✏️ 1. Skip lines as you write
Leave a blank line after each sentence. That way you have space to add more precise words or stronger ideas without rewriting or cramming words into small spaces.
🟨 2. Add new parts with sticky notes or extra paper
Need to add a sentence or even a whole new part? Write it on a sticky note or another sheet of paper and clip it to your draft. Use a star (*) or number to show where it goes.
🚫 3. Don’t erase right away
It’s way faster to revise when you can still see what you wrote. Plus, you might want to change it again or even keep what you had! Seeing both versions helps you choose your best writing.
🔊 4. Read your writing out loud
Read your draft from start to finish, including anything you added. Listen for anything that sounds confusing, choppy, or out of place. If it doesn’t sound right, that’s your sign to revise it!
⬇️📄 Click here to download a printable version of these tips and ready-to-print draft paper.
Have you heard the news?
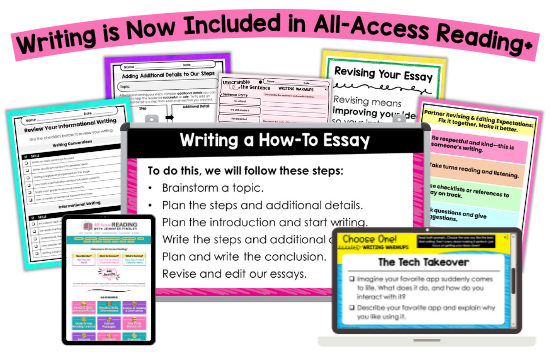
Have you heard the news? Writing has been added to All-Access Reading+! Inside the membership, you will get resources to support your instruction at the sentence, paragraph, and essay levels! Click here or on the image to check out the membership for all your literacy needs!
Want more free writing support for your 4th and 5th graders?
If teaching writing in 4th and 5th grade is difficult for you, you’re not alone. It’s really that hard, and I’d love to continue supporting you. Get your hands on my free writing toolkit to help you with pacing, procedures, and engagement. Click here or on the image to access it now!


Leave a Comment