
Use this repeatable framework to make morphology instruction stick.
You already know why morphology matters: it boosts decoding, expands vocabulary, and strengthens comprehension.
But here’s the question so many teachers still ask:
👉 What does it actually look like to introduce a new morpheme?
That first introduction is the foundation for everything that follows. Without it, students can’t fully engage with word sums, matrices, or connected texts.
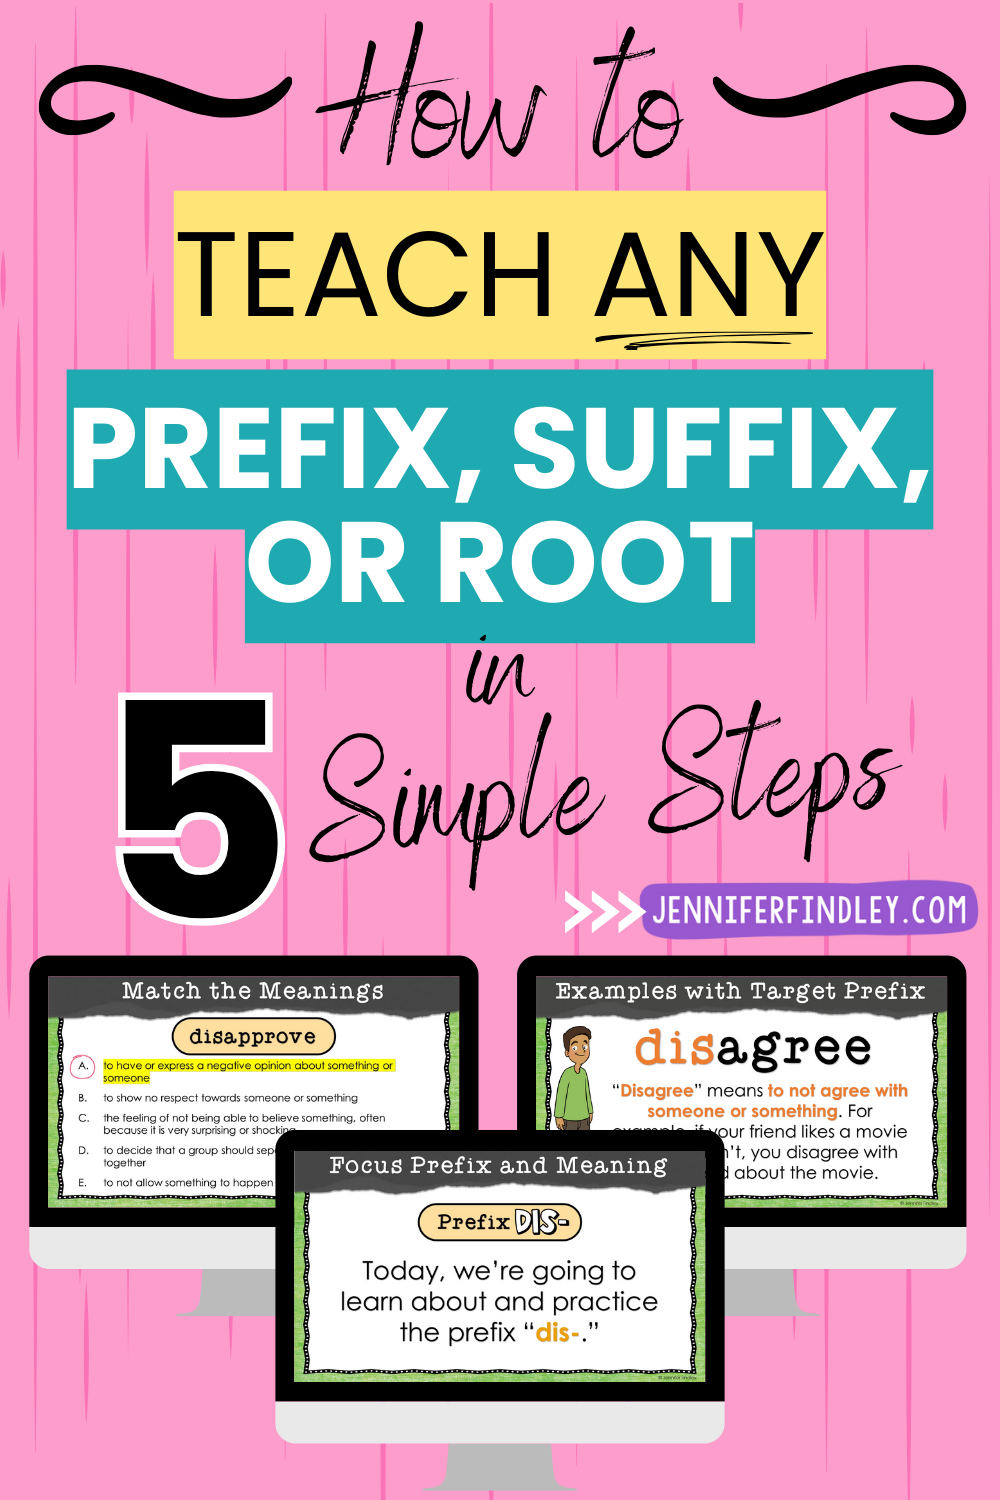
This post gives you a 5-step framework you can use with any morpheme, whether it’s a prefix, suffix, or root. I’ll model it using dis-, then show how it transfers to others.
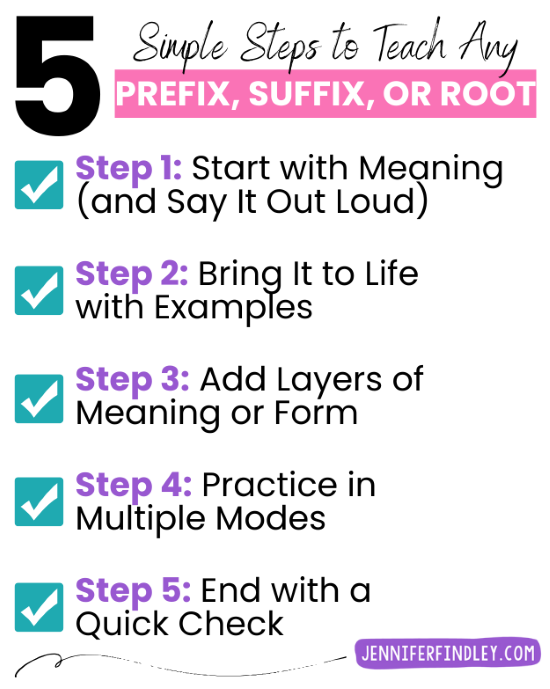
Step 1: Start with Meaning (and Say It Out Loud)
Begin by telling students what kind of morpheme it is (prefix, suffix, or root). Write the specific morpheme where everyone can see it, say it aloud, and have students repeat it.
Example:
- Prefix: dis-
- Core meanings: not, apart, undo
Signal any key notes up front, like multiple meanings or part-of-speech changes.
More examples:
- en-/em- = to make, to put into (sometimes shifts nouns to verbs)
- re- = again, back
- -ful /-less = full of/without (usually adjectives)
You don’t need to cover everything at once. Just flag that more uses exist and you’ll build on them later.
Step 2: Bring It to Life with Examples
Now connect the morpheme to real, familiar words students know or can visualize. Write the word, say it out loud, and use a short, student-friendly scenario.
Examples:
- disagree → “If your friend loves a movie and you don’t, you disagree.”
- graceful → “A swan gliding smoothly across a pond is graceful.”
- recharge → “When your phone dies, you plug it in to recharge.”
If relevant, show how the morpheme changes the part of speech:
- beauty → beautiful (noun to adjective)
- grace → graceful
- tire → tireless
This step helps students see how the morpheme works in context.
Step 3: Add Layers of Meaning or Form
Once students are secure with the base meaning, add depth.
This might look like:
- Expanding meaning ranges:
- dis- = “not” → “away” → “undo”
- re- = “again” → “back”
- Explaining form shifts (chameleon prefixes):
- en- becomes em- before certain letters (empower, embrace).
- Showing suffix stacks:
- hopeful → hopefulness
- tireless → tirelessly
- Introducing less-transparent root words:
- repair, respect, reveal
Layering helps students build a deeper understanding of how morphemes function in different contexts.
Step 4: Practice in Multiple Modes
Now it’s time for students to work with the morpheme, not just recognize it.
Use a mix of formats:
- Match words to definitions.
- Spot morphemes in sentences.
- Choose between related morphemes (-ful vs. -less) to complete base words used in context.
- Explain how the morpheme changes the base word.
- Practice spelling shifts (penny → penniless).
This is where students internalize both meaning and form.
Step 5: End with a Quick Check
Wrap up with a clear and simple check for understanding. Think quick, confident, and application-based:
- “What does dis- mean?”
- “Which word means without hope?”
- “Use a word with re- in a sentence.”
- “What happens to the word beauty when we add -ful?”
Does This Work With Roots?
Absolutely! The same 5-step framework applies, with a few tweaks:
- Introduce differently: Make it extremely clear that roots aren’t stand-alone words. Note origin or paired forms (fract/frag, cred).
- Layer differently: Show how roots combine with affixes to build families (fract → fracture, fraction, fragile, cred → credible, incredible, credibility).
- Practice differently: Add family-building or root maps so students see how one root grows many words.
Note: Greek roots are technically Greek combining forms, meaning they often stack together (e.g., telegraph, microbiology). Unlike Latin roots, which pair with affixes, Greek forms are modular and designed to combine. However, for simplicity in teaching, they’re often referred to as “roots” to keep instruction clear and accessible.
Final Thoughts
Morphology doesn’t have to feel overwhelming. With this simple, repeatable routine, you can introduce any morpheme in a way that:
- Builds confidence.
- Transfers to real reading.
- Deepens understanding across vocabulary, grammar, and comprehension.

Want This Done For You?
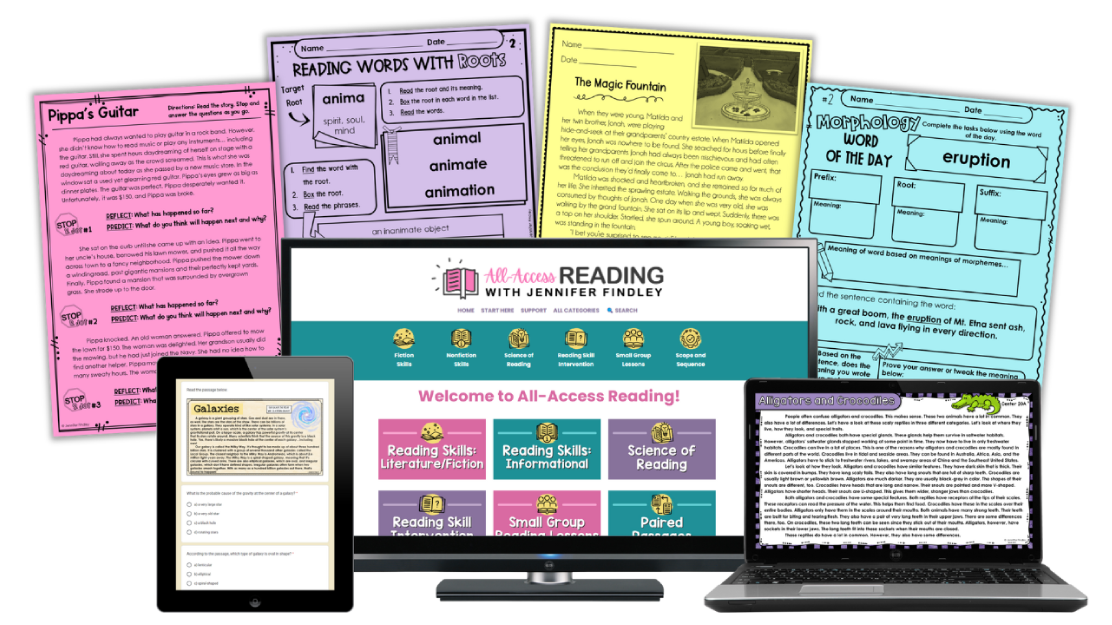
My Morphology Teaching Slides follow this exact 5-step structure for every prefix, suffix, and root.
You get:
- Definitions and visuals.
- Built-in examples and explanations.
- Words shown in contexts for deeper reading transfer.
All the planning is already done. Click here or on the image below to grab full sets and make morphology the most powerful part of your literacy block.


Leave a Comment