Fall is my favorite season! I love the cooler weather, the changing leaves, and even football season, well maybe just all the snacks. I really love incorporating fall activities into the classroom and especially fall science experiments. This post shares a quick fall science experiment that is perfect for exploring and reviewing the scientific method.
Dissolving Pumpkins Fall Science Experiment: Supplies
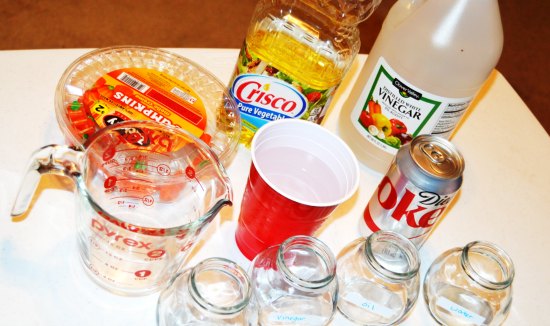
Here are the supplies you will need. Note: The printables I used are labeled as “coke” versus “diet coke” but diet coke was all I had at the time.
- Oil
- Vinegar
- Coke
- Water
- Candy corn pumpkins
- Same size containers
- Measuring cup
- Labels for the containers
Dissolving Pumpkins Fall Science Experiment: Directions
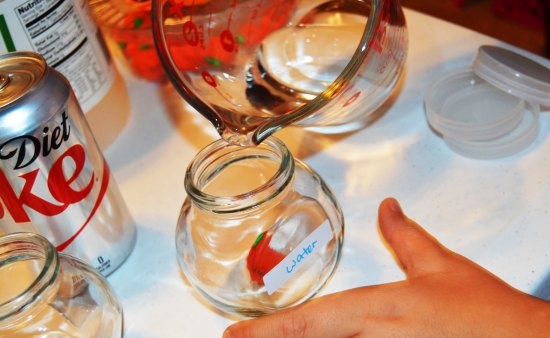
We started off by measuring 1/2 of cup of liquid into each labeled container. While doing so we talked about the importance of having the same measurement of liquid in each container.
We placed lids on our containers but this is really not necessary. The whole experiment takes only about 5 minutes.
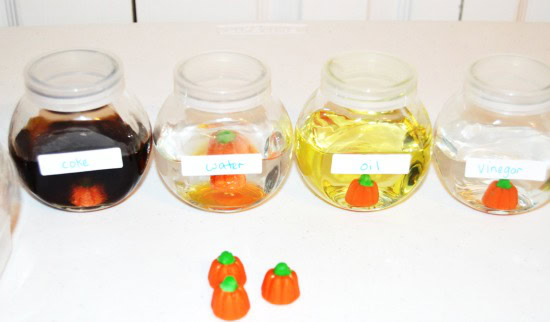
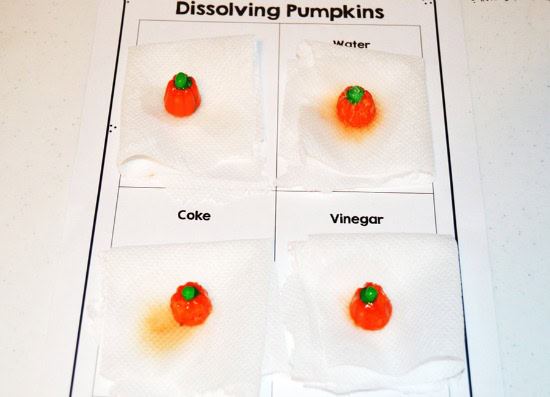
Almost immediately, the coke started dissolving the pumpkin. The pumpkin in the oil appeared untouched! I used a printable mat to place the pumpkins on while examining them. We removed the pumpkins after about five minutes, but you could also leave the pumpkins in the liquids until one of them was completely dissolved.
Free Dissolving Pumpkins Printables
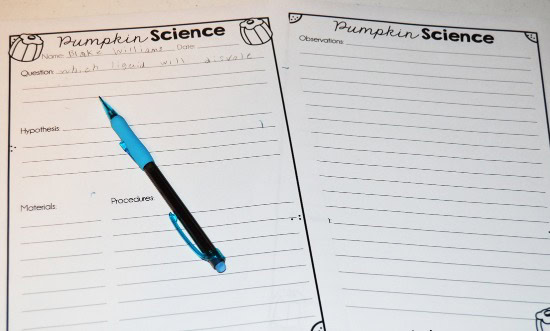
In addition to the printable mat shown above, I also put together some recording sheets to help walk you and your students through the scientific method. Click here or on the image shown to grab the free printables for this fall science experiment.
This science experiment would work well in small groups or even in science centers at the teacher’s table. Do you have a favorite fall science experiment that you use in your classroom?
MORE Fall and Halloween Activities
Fall Activities for Grades 4-5


What an interesting and fun experiment for students! I love how easy it is to set up and do! Thank you so much for sharing – I had never seen it before and can’t wait to try it out.
Great, but what scientific idea am I teaching with this? What do you say when the kids ask “why” did that happen?
As I mentioned in my post, I use this to teach the scientific method versus a specific science idea. The best part about teaching science are the “whys” so you want them to ask why. Then you have them generate a list of possible reasons using what they know about the liquids. They can even do some research. What I love about the experiment is the process and inquiry, not necessarily a “This is what I am telling you happened” approach. Hope that helps!
I just started a 5th grade tribe group on Facebook! I would love to have you join in! http://www.facebook.com/groups/5thgradetribe